Monday, June 27, 2011

Fabric, Yay!

I finally ordered some of this beautiful Schumacher fabric and am anxiously awaiting it's arrival!


so I can make some of these...
via etsy

I've also been thinking about some complimentary fabrics. Here are some great ones I found from Schumacher


Here are some more great options from the awesome Windsor Smith!

It's always fun to start with the expensive ones for inspiration and if possible find something similar at a better price point! If not then it can be worth the splurge to have exactly what you want! Do you have a favorite with the Hot House Flowers?


Saturday, June 25, 2011

Friday Night Light!

Continuing in the spirit of the florals...tonight's Friday Night Light is the Flowerfall Chandelier from Oly Studio. Such a beautiful and whimsical chandelier with it's resin flowers hanging down in an antique white finish.


Wednesday, June 22, 2011

Fancy some florals?

I don't know if it's because of summer, but lately I've really been craving floral patterns. I thought I would share some of these amazing floral wallpapers from Harlequin. Which ones do you like?

 1. Sicilia 2. Miya 3. Passion
4. Akira 5. Elodie 6. Amour

Saturday, June 18, 2011

Friday Night Light!

Tonight's friday night light is the Ikea PS Maskros pendant lamp. With it's unique design and fantastic price it's a great option for so many spaces. Now people are starting to customize them and really make them their own. It comes in two different sizes... a 22"($49.99) and a 32"diameter ($89.99). It also casts some really fun shadows at night! Check it out in all of these great spaces!


via Ikea

via Flickr


via Lonny


via Vol 25


The following is a great DIY by Jenny of Little Green Notebook. She made it into an amazing sputnik pendant. Check out the steps here.


Check it out in Amy Butler's house via Apartment Therapy. She made hers gold. Love it!


Thursday, June 16, 2011

Office - Chair Makeovers

So, I'm finally getting around to posting about the chair makeovers for my office re-do you might remember from here. This is a step by step through our process. My awesome super-talented DIYer of a mom, Kathleen, helped make this project possible! A little reminder of the before...


And the afters...

So here is the breakdown of the steps we took!


First, we needed to take the chair upholstery apart.
We were careful not to rip or tear the pieces on at least one chair so that we could use them as patterns for the new fabric. We also tried to be careful not to harm the foam inserts so that we could use them again. We marked them with arrows up and down to make it easier to put them back in.
We also did this for the fabric pieces in the same way.

Next we painted the frames with an off-white semi-gloss that I had left over from painting trim.


After using the old pieces as patterns we cut out the stripes for the backs of the chairs. This had to be the  first piece to go on. This got stapled in on the inside. I would suggest to not pull this extremely tight as there needs to be a bit of give when we sit in the chair and you want it to follow the contour.


Next we cut out the front of the chair. We lined this up the same on each chair so the pattern would be the same up and down and across. 


We ironed a fold in the edges so we wouldn't have to fold it while keeping the foam insert in place. This let the piece fit in perfectly.


We layed in the piece of foam and then layed this piece of fabric on top (exactly like the pattern dictated). We started at the top and stapled it into place. Those outside staples show, but will eventually be covered with the piping. Try to keep them as close to the edge as possible. It's easier to secure the top and bottom and then middle sides and then fill in the rest of the staples. This lets you make sure you aren't pulling the fabric off center as you go around the edges. Just be careful not to stretch the fabric too much while you are working on it.


Next Mom made piping because we could find double piping. To apply the piping we used super glue and tacked around with small staples. If you trim the piping on a slant it makes it easier to line up at the ends.

The bottom of the chair is much easier to do. Here is the process explained. Use the old fabric as your pattern to cut out the new fabric. We made sure that all of the fabric pieces were on the same part of the fabric pattern. Staple top and bottom first and then one on each side making sure you stretch it taut. Then fill in the staples in between stretching the fabric as you go. On the corners pull the fabric and staple it right in the center. Then work from each side of the corner pulling and stapling it in place. This will make it smooth on the top. Trim away any excess. If you want to finish off the bottom so that you won't see any staples you can cut a piece of fabric about an inch smaller than the bottom of the chair and secure in place with staples.


Are you still here? Did you make it to the end? Hope this helps inspire you to tackle your own chair project!

Monday, June 13, 2011

Oh, Coralie!

I'm sure a lot of you are familiar with Coralie Bickford Smith's amazing designs for the F. Scott Fitzgerald books and the the penguin classics. I just wanted to share a few more that you might not be as familiar with....Love, love, love, her designs and want to collect them all!

Here are some of the metallic beauties you might recognize...


the originals (where it all started for me)...


Boys Adventures classics...


Arabian Nights...


Poems...


The newest Great Food collection...


Friday, June 10, 2011

Friday Night Light!

Sorry for the lapse in posting. There's been a lot going on, but I'm back! Tonight I thought I would do a roundup for friday night lights! Tonight is all about the brass/gold lamp. I've definitely hopped on the gold train and am currently digging the warm metal on these great lamp designs! Any favorites?


Friday, June 3, 2011

Friday Night Light!

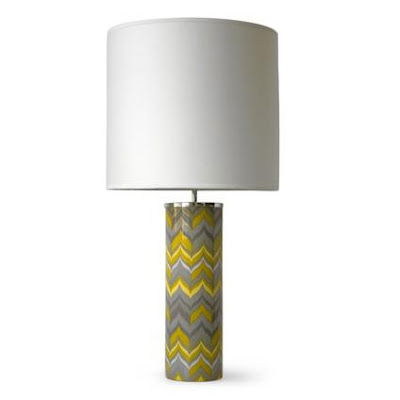
Tonight it's friday night lamps brought to you by Jonathan Adler! First is the carnaby collection. They are porcelain with a high gloss glaze, and would add the perfect pop of color to any room! Which one is your fav?


I also had to include these fun lamps! Perfect for the junior Adler lover, or to bring a touch of whimsy to any room!


via flickr